Trezor is one of the world’s leading manufacturers of hardware wallets and introduced the Trezor One Hardware Wallet a few years ago. We have been using Trezor One for over 2 years now and want to share our Trezor One experience with you. The Trezor One offers great ease of use and is considered very safe (has never been hacked before).
Compared to traditional software and desktop wallets, a hardware wallet offers significantly better protection against phishing and hacker attacks as well as potential thieves. Therefore an investment in a hardware wallet is worth every Dollar. If you also want to buy a hardware wallet, read our Trezor One Review to the end to find out all the advantages and disadvantages of the wallet.
Trezor One Price and Official Dealers
You get the best price for your Trezor One for 69€ on Amazon. On the official website of Trezor you can also buy your Trezor, but here only the hardware wallet in white color is offered and costs 84€.

This puts the Hardware Wallet in the middle of the price competition. The wallet can also be purchased directly from the manufacturer or on eBay or officially licensed resellers. However, it must be ensured that the respective sellers are reputable and do not represent fraudsters.
In our opinion, the best option is to buy the Trezor One directly from the manufacturer on the official website or on Amazon. Clicking on this link will take you directly to the Trezor website, where you can purchase the Trezor One in just 5 minutes.
All prices on the manufacturer’s website are displayed in Euro and include VAT. Bitcoin, credit card and Paypal are accepted as payment methods. The shipping is included in the price and takes place in almost all countries of the world. Although the shipment is from Prague (Chechnya), the delivery was within a few days in our mailbox. The package is very small and therefore fits in your mailbox.
>> Buy Trezor One directly from the manufacturer <<
Trezor One first impression and scope of delivery
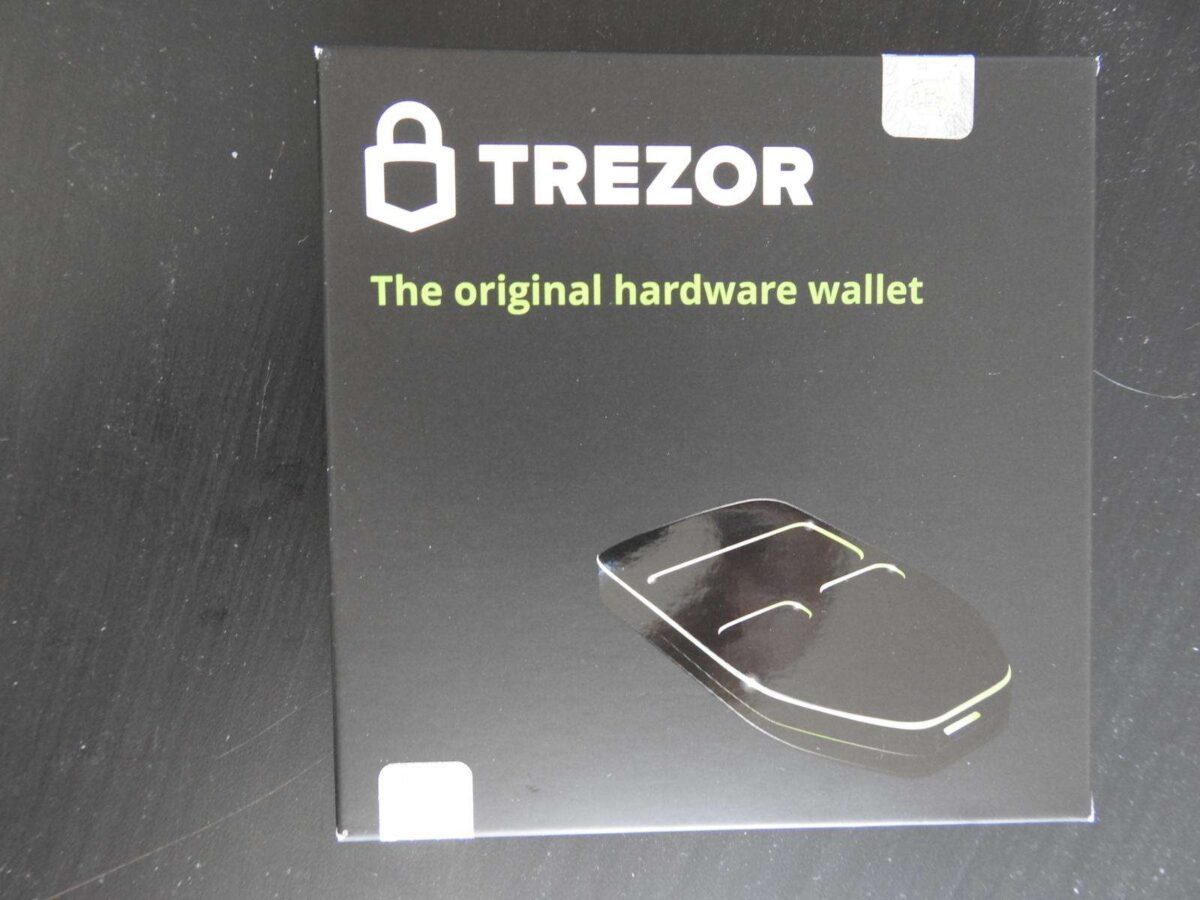
If the postman brings you the parcel and you open it full of anticipation, please make sure that all seals are intact. Furthermore, the packaging must not be damaged, otherwise your Trezor One may be tampered with and someone may want to steal your cryptocurrencies. Even if this step could be dismissed as lapidary, please take it very seriously! Better a little more controlled than a fortune lost.

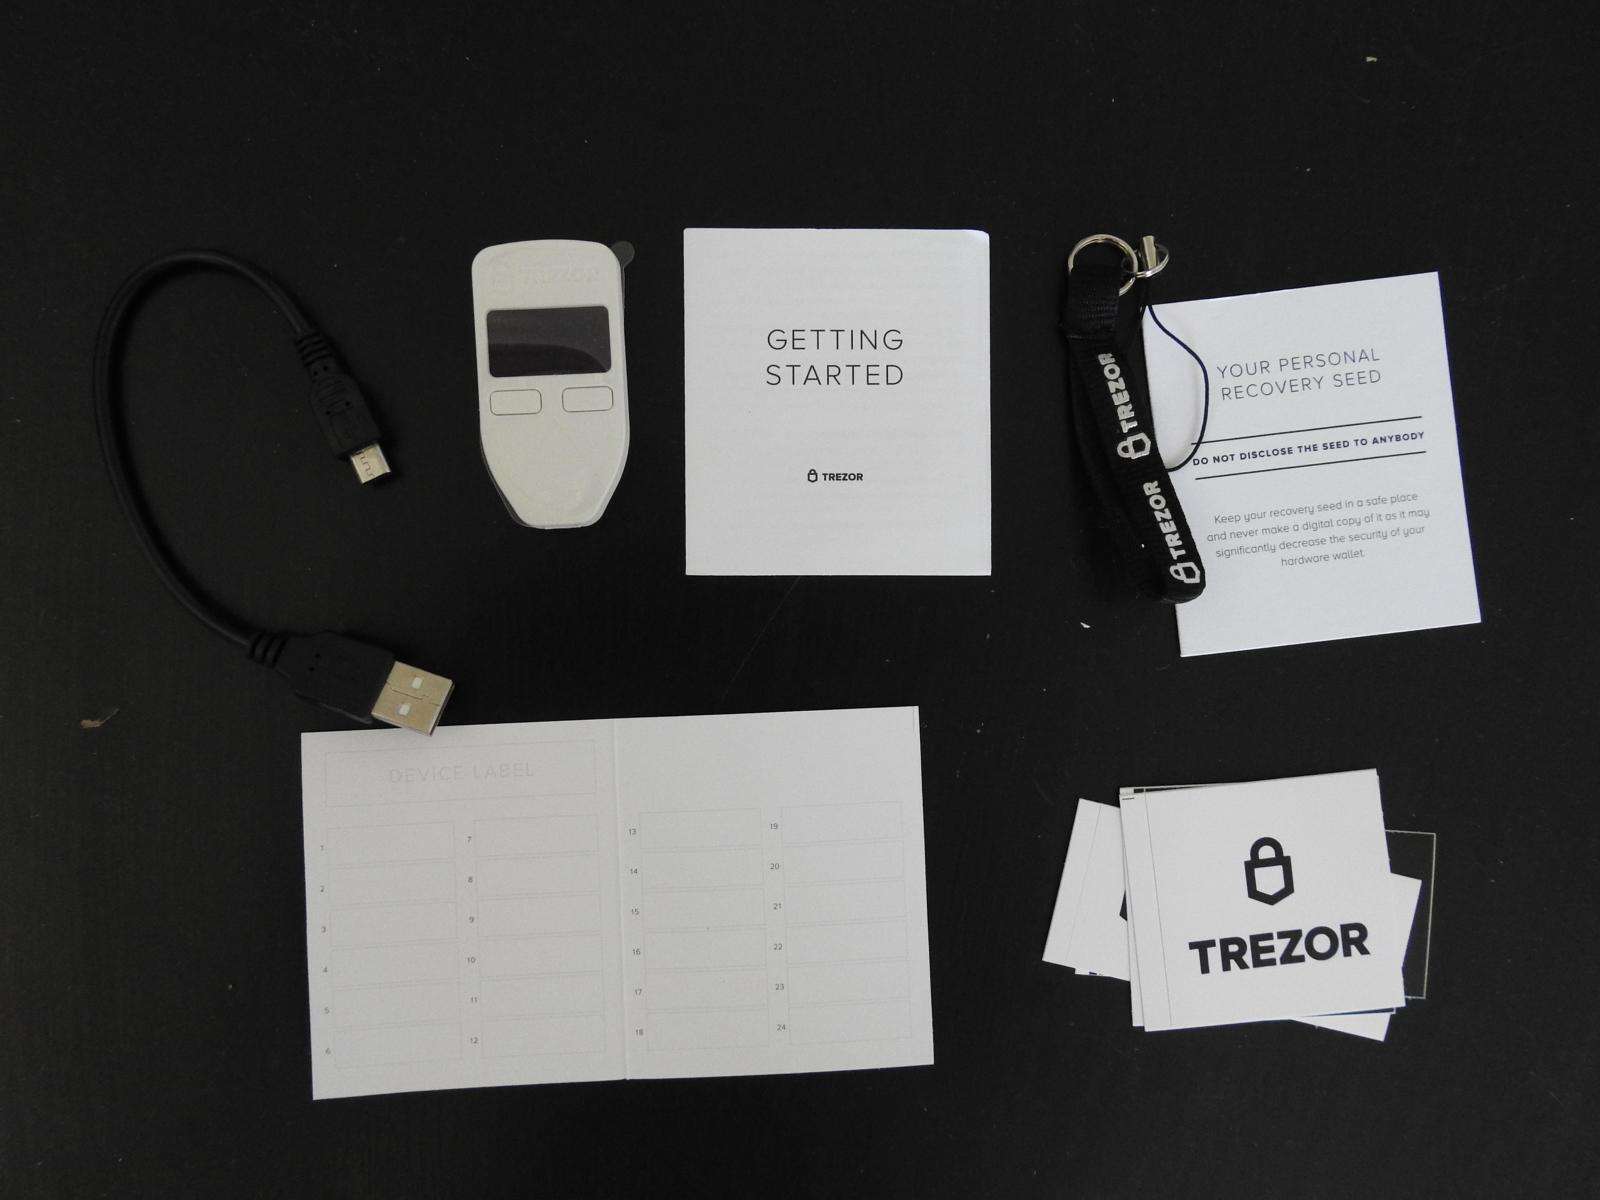
If nothing is broken and you don’t have to exchange the stick, the following is included:
- The Trezor One
- The USB-Trezor connecting cable
- A lanyard, but we recommend never to carry the Trezor on the key, too big is the danger of loss.
- Two recovery sheets on which you can write down your recovery seed (consisting of 24 words) and a map containing further information about the first setup.

Your Private Keys are stored on Trezor One and never come into contact with your PC or the Internet. When you have received your order in the best quality and you have checked everything several times, you can set up your Trezor One.
If you want to use your Trezor with your mobile phone, you need a connection cable (currently only available for Android devices!), which costs another 15€ extra and can be purchased directly from the manufacturer.
Trezor One Set Up
To set up your Trezor, you must take the following steps, all of which are more or less self-explanatory:
- Connect your Trezor to your PC or laptop using the USB cable.
 Afterwards you only have to follow the commands on the display. If there is an Internet connection, the software will be installed on the device. If you already have a firmware on your Trezor, contact Trezor support immediately because there is an error. All Trezor One are delivered without any firmware!
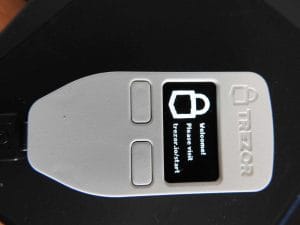
 - The display will now show that you should go to the official website www.trezor.io/start. On the page you have to choose whether you own a Trezor One or the newer model, the Trezor Model T. Click on the Trezor One. You will also learn in a short explanation what a PIN and a Recovery Seed is.
- In addition you can now choose whether you want to create a new wallet or restore an old one. Now click on “Create a new Wallet” as you want to create a new wallet.
- Now you are asked to name your Trezor. To do this, the device must be connected to your computer all the time.
- Trezor now asks you to assign a 4-8 digit PIN. You must enter this PIN each time you restart your Trezor One. If you enter the PIN 3 times incorrectly, your Trezor will lock automatically. It will take some time after the first lock until you can re-enter your PIN. Each time, after 3 incorrect entries, the locking time is longer. This prevents abuse.

- In the last step you will be shown your “Recovery Seed”. The Trezor display will show you a total of 24 words. These are best written on the included “Recovery Sheet”. After each word that appears on the display, you can display the next word by pressing the right button on your Trezor. Store your Recovery Seed in a safe place that only you have access to. Otherwise, a thief can gain access to your assets. You will also need your Recovery Seed if your Trezor is stolen or you lose it.
If you have gone through these steps successfully, you can manage your cryptocurrencies – send and receive. You will also be asked to leave your email address and subscribe to the newsletter during setup.
The model is compatible with the following operating systems:
- Mac
- Windows
- Android
- Linux
- Chrome
Receive cryptocurrencies with the Trezor One – Guide
The Trezor Desktop software allows you to manage different cryptocurrencies. Bitcoin is preset by default. To deposit Bitcoin to your Trezor Wallet now, click on the “Receive” tab. You will then be shown a Bitcoin address where a part is missing.
To display the full Bitcoin receiving address, click on “Show full adress”. Now the full address will appear on both your desktop computer and your Trezor. Now compare the address on the display of your Trezor with the Bitcoin address displayed in the Trezor software. If these two addresses match, you can transfer Bitcoin from an Exchange, e.g. Litebit, to your Trezor.

If you want to know how to buy Bitcoin easily, quickly and safely, take a closer look at our Bitcoin Buying Guide (if you click on this link, you will be redirected to the 5-minute guide). To copy the address you can either copy the address with your right mouse click or scan the barcode. In addition, you can also send the Bitcoin receiving address by e-mail.
It is also possible to display the address again as often as desired or to generate a new one. If you buy Bitcoin on Litebit and the transaction was executed on Litebit, the Bitcoin blockchain may take short or long depending on the load.
Normally, a transaction is executed and validated within a few minutes. In this case, the Trezor Hardware Wallet dashboard and account balance will be updated. In addition, you can always see in the history when which transaction was received, by whom or sent.
You can find the following information in the overview:
- All incoming and outgoing payments are documented.
- The current exchange rate of a cryptocurrency, which you can select in the settings, Bitcoin is preset.
- There is a chart showing the value of transactions over the last 30 days.
- Last but not least, there is a search function with which you can search through all transactions made so far. This is especially helpful if you have labeled your transactions.
As soon as a transaction is received at a Bitcoin Trezor Wallet address, a new address is generated for the next transaction. This is to prevent multiple transactions from being assigned to a specific wallet address. Nevertheless, you can use a receiving address more than once.

Receiving cryptocurrencies is so easy with the Trezor Wallet, illustrated with Bitcoin as an example. If you are looking for a reliable exchange where you can buy Bitcoin, Ether, XRP and other Altcoins by credit card, then take a look at our Litebit experiences (if you click on this link you will get to our Litebit exchange review).
>> Buy Trezor One directly from the manufacturer <<
Sending Cryptocurrencies with the Trezor Hardware Wallet – Step by Step Guide
To send Bitcoin and other cryptocurrencies with your Trezor Wallet, click on the “Send” tab.
Then you will see an overview in which you have to enter several pieces of information. This includes the following information:
- The receiving address, i.e. where your bitcoin or the respective cryptocurrency should be sent to.
- The respective amount is indicated in the respective digital currency, e.g. 0.5 BTC and in Euro, USD or many other Fiat currencies.
- In the last step you have to choose how high the transaction fees should be. Always keep in mind: The higher the fees, the faster your transaction will be executed. If you have time, you can simply leave this option on the default setting.

Trezor also offers other intelligent features that are more suitable for experts. This includes the following:
- One transaction can be sent to multiple recipients, saving transaction fees and time.
- Transactions can be sent without a signature.
- The transaction can be delayed and will not be executed until a later date.
Please only use these functions if you are 100% sure how the whole thing works in practice. Nothing is worse than to find out afterwards that you made a mistake. If you want to try it out, then use small amounts for your practice tests, then of course this is no problem.
When you have entered all the information, you can click on the green “Send” button. The transaction will now appear on the display of your Trezor One.
Now check that the reception addresses match the ones you typed. If this is the case, you can use the right button on the Trezor to confirm your transaction(s).
In the first step you confirm the receiving address, in the second step the total amount of the transaction is displayed again. If this is correct, you can confirm again, only then will the transaction be executed.
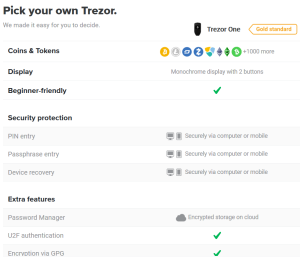
In total, Trezor offers the use of over 1,000 different cryptocurrencies. You can use these coins directly with the Trezor software:
- Bitcoin
- Ethereum
- Litecoin
- Dogecoin
- ZCash
- Dash
- Namecoin
- Bitcoin Cash
- Ethereum Classic
- Bitcoin Gold
- Ubiq
- NEM
- Expanse
- ERC20-Tokens
If you want to use other Altcoins, the Trezor One is compatible with many interfaces, such as the Myetherwallet, Electrum, Mycelium, Multibit, Coinmap, Encompass, Bitstamp and many more dApps.
In total the 14 mentioned Coins are supported, for all others there are compatible dApps, so that these can also be used.
>> Buy Trezor One directly from the manufacturer <<
Restore your Trezor One with your Recovery Seed
If you lost your Trezor for some inexplicable reason or it was stolen, you can buy a new Trezor One and reactivate it using the Recovery Seed. To do this, you must first switch to the wallet software and click on “trezor.io” on the Wallet tab. Then click on the “Trezor Recovery” button.

In the next step you will be asked to assign a new PIN. You have to enter this twice to avoid errors and to confirm your PIN. You will then be prompted to enter the words from your Recovery Seed. The Trezor shows you on the display which word, for example word number 16, should be entered. So you have to enter all 24 words.
Once you have successfully entered all 24 words, you will be asked for your PIN again. You must enter and confirm this. Immediately after that you can access your account again, if the reactivation worked completely. Overall, this process is very easy and fast to perform, as you can type the words using the keyboard of your PC.
A direct competitor solved this somewhat differently and more laboriously. To make the Ledger Nano S or Nano X more reactive, all words must be entered using the two buttons on the hardware wallet itself. This is a very tedious job, because the alphabet has 26 letters and you can jump one letter up or down with each button.
This is an advantage with Trezor, but it can’t be ruled out that keyloggers will track your recovery seed. Seen neutrally, it can be seen as both an advantage and a disadvantage.
The following video shows how to restore your Trezor One quickly and easily.
Advantages and disadvantages of Trezor One
The advantages of the Trezor One are:
✅ Private Keys are stored on the Trezor One, there is never a connection to the Internet or your computer
✅ Over 1,000 crypto currencies are supported.
✅ Trezor delivers new updates regularly
✅ Each transaction must be confirmed manually.
✅ Very simple operation and user interface
✅ Multilingual customer support that really helps quickly and reliably
Conclusion on the Trezor One Test
Trezor One is really easy to use and the user interface is very clear. The explanations in the user interface also support the user in expanding his own knowledge.
The Private Keys are securely stored on your Trezor at all times and protected from hackers and phishing attacks.
The price is in midfield, but security is very high. Trezor has made it almost impossible to steal your crypto currencies with a considerable number of security features.
Unfortunately only 14 coins are supported so far. For some interested parties this can be a knockout criterion. But if you don’t mind using third-party apps, you can buy Trezor One with a clear conscience. If you need more than these 14 coins, the Trezor Model T can be a solution. This already supports 51 coins.
Overall, we are completely satisfied with the Trezor One and can definitely recommend the Hardware Wallet to others. If you want to keep your cryptocurrencies safe, you should definitely buy a hardware wallet like the Trezor one.
>> Buy Trezor One directly from the manufacturer <<
If you’re still unsure which hardware wallet (if you click this link you’ll get to the overview) is right for you, then check out more reviews with Trezor One alternatives from us:
[ratings]


